Install the base pixel in WordPress
Install the plugin in WordPress
In your WordPress dashboard:
-
In the sidebar (left), select
Plugins>Add Plugin. -
In the search box provided (top, right) type in
"Taboola Pixel":As you type, the system automatically filters for matching plugins.
-
Locate the
Taboola Pixelplugin and click onInstall Now(top, right):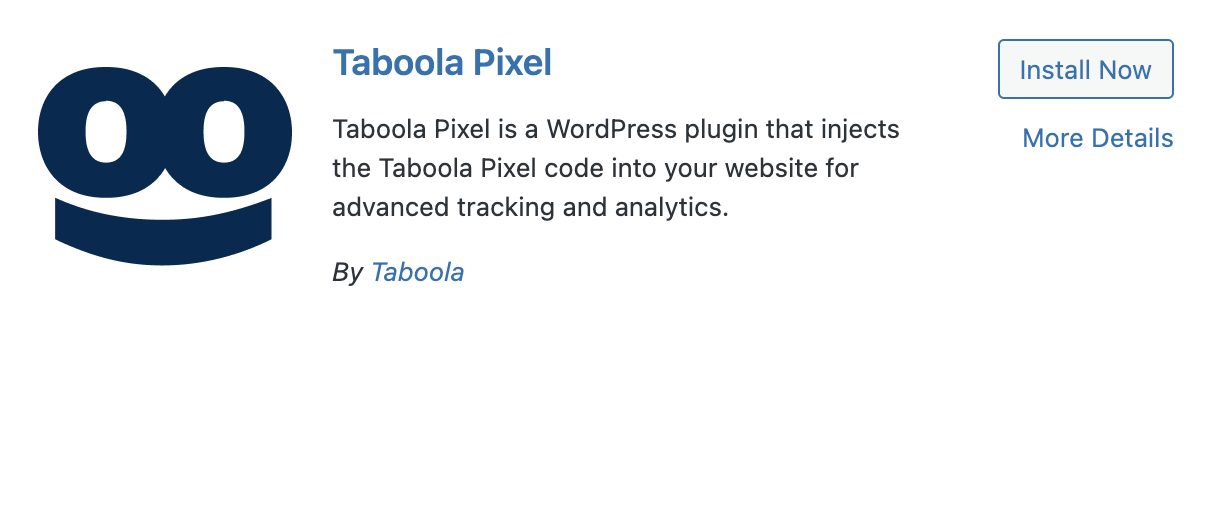
-
Once the installation has run, click on
Activate(top, right):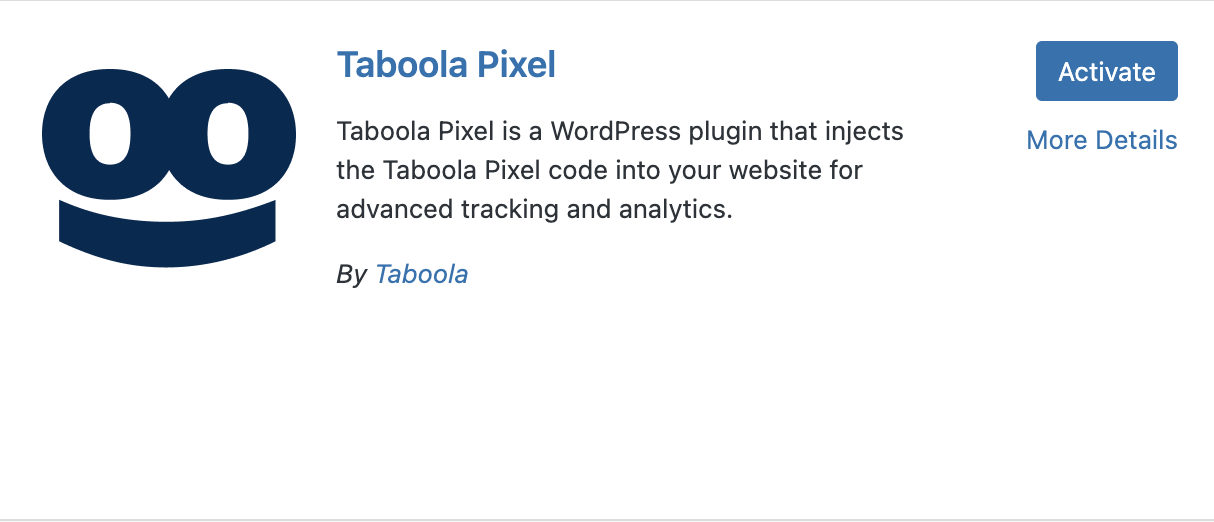
-
In the sidebar (left), select
Taboola Pixel, and follow the instructions below to install the base pixel.
Install the base pixel
Once you have installed the plugin (as described above):
-
In your WordPress dashboard, select
Taboola Pixel(left). -
Click on
Connect Realize Account:
-
If prompted, log in now. (This step is not required if you are already logged in.)
-
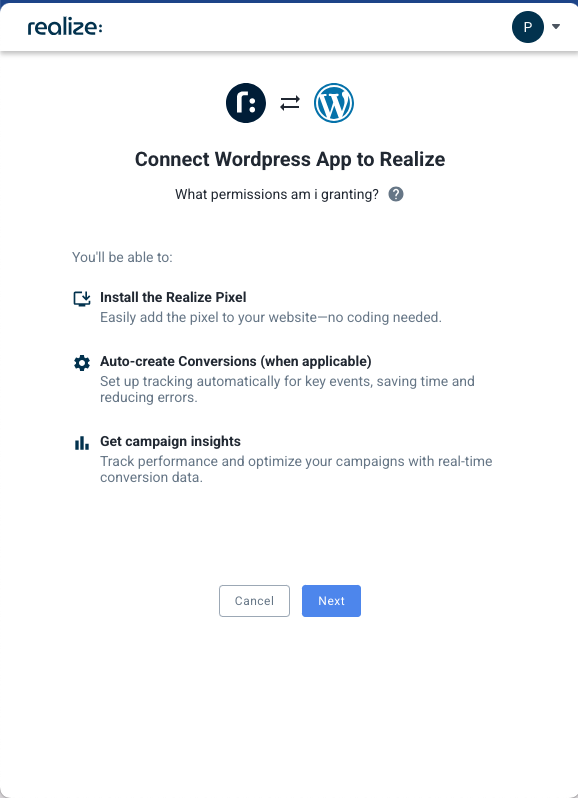
A Connect WordPress App popup appears. Click on
Next:If the popup does not appear, disable any ad blockers, and reload the page.
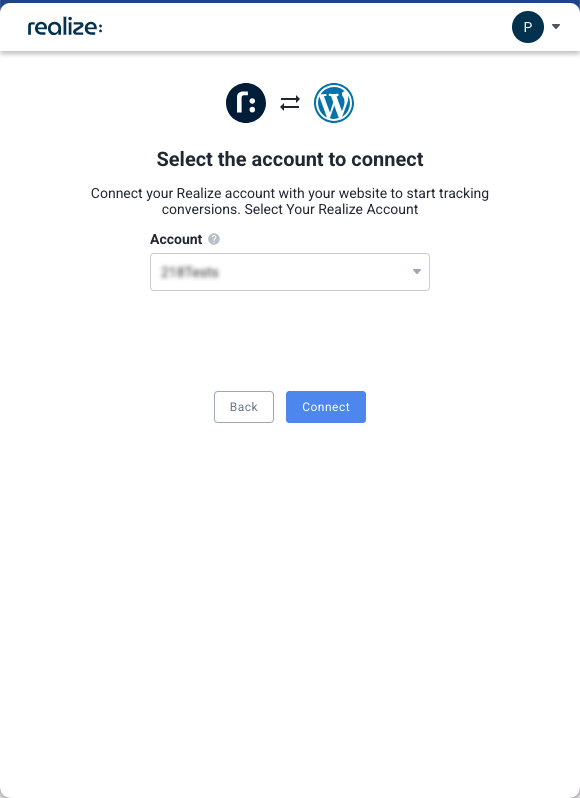
- Select the Realize account that will use to track conversions and click on
Connect:Tip: to select a different account, begin typing the account name.
- Click on
Install Pixel:

- Upon installing successfully, a success message displays:
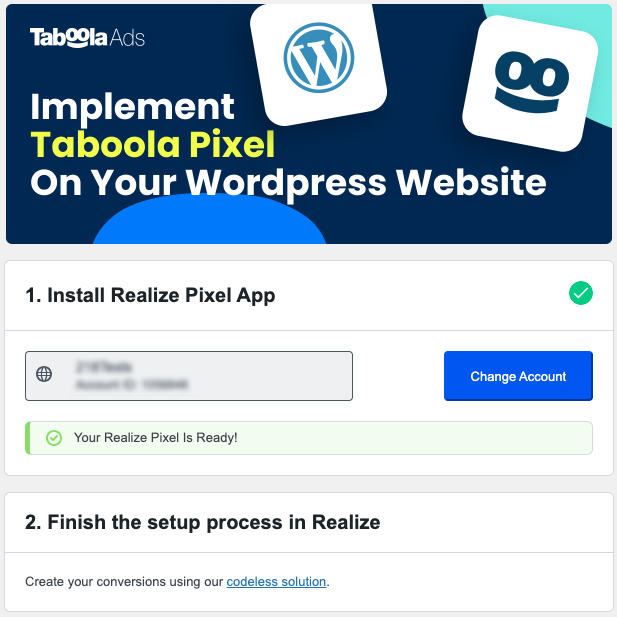
What's next?
Well done - you have successfully installed the Taboola base pixel!
Next, it's time to....
- Create codeless conversions.
- Use the Testing Tool to verify that your conversions are working smoothly.
Updated 7 months ago