Start Checkout
Conversion 2 of 7
-
Open Realize, and select the account (top, left) that you will use to track conversions.
-
In the sidebar (left), select
Tracking.
-
Click on
+ New Conversion(far right).Select
Create conversions using codeand clickContinue.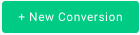
-
Type in a
Conversion Namethat describes this conversion:(This is a descriptive name of your choice.)
Start Checkout -
For
Conversion Type, selectEVENT: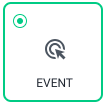
-
Do not fill in a
Fixed Value. -
For
Category, select:Start Checkout -
Confirm that the
Event Nameis:start_checkout
Enter the name exactly as shown above, or the event will not be recorded.
-
(Optional) If desired, edit the following fields:
Click Through Conversion WindowView Through Conversion Window
-
Clear the
Include in total valuecheckbox.Make sure that only the
Include in total conversionsfield is checked. -
(Optional) If desired, edit the following fields:
Audience PropertiesAggregation Type
-
Skip the
Event Codesection. -
Review your chosen settings, and click on
Create(bottom, right):
Updated 7 months ago