Add event pixels in Google Tag Manager (using a template)
Add Taboola event pixels to GTM (Google Tag Manager) using a template.
Overview
Now that you have added the base pixel to your website, you are ready to add 1 or more event pixels.
Event pixels enable you to track conversions and gather important insights - e.g. ROAS (Return On Ad Spend).
To add the event pixel using a template, follow the guidelines below.
Depending on the event that you need to track, custom development may be required.
See also
- For a list of available flows, see: Event pixels
- For an overview of conversion tracking, see: Conversion tracking
URL-based conversionsURL-based conversions rely on the base pixel only - they do not require an event pixel.
Shopify store owners should use our Shopify app.
High-level flow
Tracking an event-based conversion requires the following steps: See
End-to-end flowIn Realize:
- Edit or add an event-based conversion.
In GTM:
- Add an event trigger.
This may require custom development. See: Trigger types
- Add the event pixel tag.
The
Event Namefields in GTM and Realize must have identical values.
Realize setup
Edit an existing conversion
If you already created a conversion in Realize, open it and make a note of the Event Name:
- Open Realize, and select the account (top, left) that you will use to track conversions.
- In the sidebar (left), select
Tracking. - Click on the
Editicon for the relevant event-based conversion rule. - Scroll down to the
Event Namefield, and make a note of the value filled in.The
Event Namefields in Realize and GTM must have identical values.
Otherwise, Taboola will not be able to receive events passed by GTM. - Keep Realize open and continue with the GTM setup below.
Create an event-based conversion
If you have not yet created a conversion in Realize, create it now:
The instructions below illustrate the steps for setting up a registration event.
Other conversions - e.g. a purchase event - require slightly different steps.
For additional guidelines, see the Help Center.
-
Open Realize, and select the account (top, left) that you will use to track conversions.
-
In the sidebar (left), select
Tracking. -
Click on
+ New Conversion(far right).Select
Create conversions using codeand clickContinue. -
Type in a
Conversion Nameof your choice - e.g.Complete Registration.This is a descriptive name for your convenience. It need not match any value in GTM.
-
For
Conversion Type, selectEVENT:
-
(Optional) If relevant, fill in a
Fixed Value.Tip: If the event includes a dynamic value - e.g. a purchase event - leave this field blank. For additional guidelines, see the Help Center.
-
Select the relevant
Category- e.g.Complete Registration. -
Confirm that the
Event Nameiscomplete_registration.The
Event Namefields in Realize and GTM must have identical values.
Otherwise, Taboola will not be able to receive events passed by GTM. -
(Optional) If desired, edit the following fields:
Click Through Conversion WindowView Through Conversion Window
-
(Optional) If relevant, clear the
Include in total conversionscheckbox.Tip: Always include the most important conversions, so that the Taboola algorithm will optimize towards them. For additional guidelines, see the Help Center.
-
(Optional) If relevant, clear the
Include in total valuecheckbox. -
(Optional) If desired, edit the following fields:
Audience PropertiesAggregation Type
-
Skip the
Event Codesection.(We will use GTM to insert the relevant code.)
-
Review your chosen settings, and click on
Create(bottom, right):
TipWhile the
Trackingscreen is open, copy yourAccount ID(top, left).You will need this for the GTM setup (next section).
GTM setup
First steps
If you have not already done so, open your Google Tag Manager workspace:
-
Open Google Tag Manager.
(You may be prompted to log in with Google.)
-
Under
Container Name(left), click on the relevant container.Note the
Container ID("GTM-XXXXXXXX") on the far right.(You can change your selection later, by clicking in the top, left corner.)
-
Select a workspace (top, left), or just use the
Default Workspace:
Add a GTM trigger
If you prefer, you can perform this step later, while adding the event pixel (next section).
In your GTM dashboard:
-
In the navigation panel (left), select
Triggers:
-
Click on
New(top, right):
-
Click on the
Trigger Configurationcard. -
Choose the relevant trigger type, and configure it as needed.
See: Tips & Techniques > Trigger Types (below).
-
Click on
Save(top, right):
Add the GTM tag
In your GTM dashboard:
-
In the navigation panel (left), select
Tags.
-
Click on
New(top, right):
-
Click on the
Tag Configurationcard. -
Under
Custom, selectTaboola Pixel.To filter the list, click on the search icon
 (top, right) and type in
 "Taboola".If the
Taboola Pixeltemplate is not present, see: Tips & Techniques > Adding the Taboola Pixel template (below). -
Fill in the
Taboola Account IDfor the account that you used to create the conversions.Tip: To find your Account ID, see: Tips & Techniques > Obtaining your Account ID (below).
-
For
Pixel Type, selectEvent pixel. -
Select the relevant
Event Namefrom the dropdown provided - e.g.complete_registration.The
Event Namefields in Realize (above) and GTM must have identical values.(Not to be confused with the
Conversion Namefield in Realize, which is merely descriptive.) -
Click on the
Triggeringcard, to set up a trigger for this event. -
Select the trigger that you created above (previous section), or click on the
+icon (top, right) to define one on-the-fly.See: Tips & Techniques > Trigger Types (below).
-
Once your tag configuration is complete, click on
Save(top, right):
-
When prompted, enter a descriptive name for the tag - e.g.
Taboola Event Pixel - Subscription Event.
At this stage, your changes are not live - you still need to publish them.
Preview your changes (optional)
Although, you have added the tag within GTM, your changes are not live yet - you still need to publish them.
You can optionally preview (test-drive) your changes before you publish them. If you prefer to publish your changes immediately, skip ahead to the next section.
The
Publishaction will publish all recent changes - including changes made by other team members within this GTM workspace.
When to use preview
- Other team members are making changes in the same GTM workspace.
- You want to confirm your setup before you publish it.
- You want to test why a tag is not working as expected.
In your GTM dashboard:
-
Click on
Preview(top, right). -
Enter the URL of the page where the customer journey begins (e.g. the landing page). Then click on
Connect:- The Tag Assistant is opened in a new tab.
- If the connection is successful, your webpage is opened in a separate window.
-
Once a connection is made, click on Continue.
-
Review the
Outputwindow to see which tags were fired: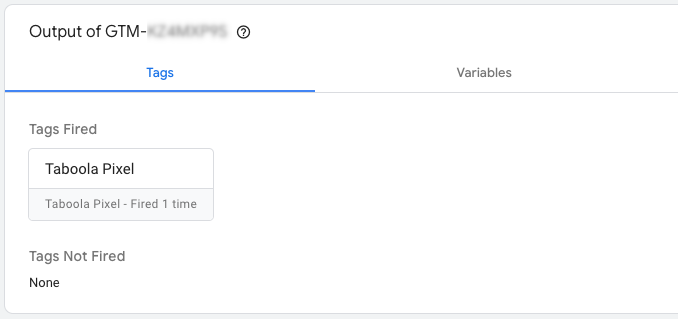
-
Click on the
Closeicon (top, left) to stop debugging:
-
Once you are done with the Tag Assistant, close the browser tab.
Publish your changes
The
Publishaction will publish all recent changes - including changes made by other team members within this GTM workspace.
- Click on
Submit(top, right). - Review the
Workspace Changes.This is the set of changes that will be deployed.
- (Optional) Enter the following fields:
Version Name- e.g."Taboola Event Pixel - Subscription Event"Version Description- e.g."Added the Taboola Event Pixel - Subscription Event".
The above fields can help when reviewing a history of changes to your GTM container.\
- While you wait for GTM to publish your changes, sing like no one is listening :)
- Once published, a summary page appears.
What's next?
Well done! You have added an event pixel, and set up your event-based conversion!
Next, you should verify that everything is running smoothly.
Tips & techniques
The sections below contain different tips & techniques that can help with your integration.
TipAfter you click through to Tips & Techniques, you can use the browser
Backbutton to get back.
Adding the Taboola Pixel template
Taboola Pixel templateIf you have not yet added the Taboola Pixel template, follow the steps below:
-
In the navigation panel (left), select
Templates: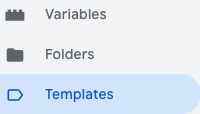
-
In the
Tag Templatessection, click onSearch Gallery:
-
Search for a template called
Taboola Pixel.Make sure that the exact name of the template is
Taboola Pixel. -
Select the template and click on
Add to workspace:
-
In the confirmation pop-up, click on
Add.
Obtain your Account ID
To obtain your numeric Taboola Account ID:
-
Open Realize, and select the account (top, left) that you are using to track conversions.
Make sure to select the Taboola account that you are using to track conversions.
Network Pixel:
For network-level conversions, you must create conversions under your Network Account in Realize (top, left).
Note that all sub-accounts in your network can use the conversion rules and audiences created at the network level.
Learn more: Network-level conversions
-
In the sidebar (left), select
Tracking. -
Copy the numeric
Account IDon the screen (top, left):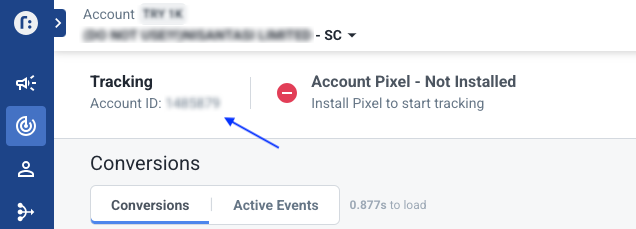
Trigger types
Depending on the trigger type, custom development may be required. Some sample use cases are presented below.
Case 1 - Separate Thank You page
Thank You pageIf a successful registration loads a separate Thank You page (with its own URL), you can set up a GTM trigger without custom development.
Alternatively, you could set up a URL-based conversion in Realize, and skip the event pixel setup altogether. However, for the purpose of this example, we will use an event-based conversion.
Your flow would look something like this:
GTM dashboard
In your GTM dashboard:
-
In the navigation panel (left), select
Triggers:
-
Click on
New(top, right):
-
Click on the
Trigger Configurationcard. -
Choose
Page Viewas the trigger. -
Choose
Some Page Views. -
Select
Page URLandcontainsand type in a fragment of the URL - e.g."thankyou.php". -
Once your tag configuration is complete, click on
Save(top, right):
-
When prompted, enter a descriptive name for the trigger - e.g.
Subscription Event Trigger.
Case 2 - Thank You pop-up
Thank You pop-upIf the Thank You message displays on the same page - e.g. via a pop-up - some custom development is needed.
Your flow might look something like this:
dataLayer.push
(Requires custom development)
- Prepare a Data Layer event code snippet. For example:
window.dataLayer = window.dataLayer || []; window.dataLayer.push({ 'event': 'registrationComplete' }); - Ask your web developer to update your registration funnel so that the above script is fired for each successful registration.
- (Optional)
Previewyour website in the GTM dashboard, and confirm that the event is fired.> See Preview your changes (above)
You are now ready to set up the event in the GTM dashboard (next section).
GTM dashboard
In your GTM dashboard:
-
In the navigation panel (left), select
Triggers:
-
Click on
New(top, right):
-
Click on the
Trigger Configurationcard. -
Choose
Custom Event(underOther) as the trigger. -
Type in an event name, exactly as it appears in the Data Layer event code snippet that you prepared above - e.g.
registrationComplete. -
Click on
Save(top, right):
-
When prompted, enter a descriptive name for the trigger - e.g.
Subscription Event Trigger.
Additional resources
In-depth coverage of GTM and the GTM Data Layer is beyond the scope of this article. For your convenience, some additional resources are provided below.
GTM Data Layer
- Google Tag Manager Custom Event Trigger Explained (An in-depth tutorial for beginners)
- The data layer (The official GTM docs)
GTM Preview
- A Guide To Google Tag Manager Preview Mode (An in-depth tutorial for beginners)