Add the base pixel to an SPA
With standard web pages, each time a page is loaded, a page_view event is triggered for that URL.
Since this is not the case for an SPA (Single Page Application), additional work is required.
Physical page refresh
Make sure that the pixel is fired on each page refresh. Typically, this is achieved by adding the base pixel to the <head> of your page:
<!-- Taboola Pixel Code -->
<script type='text/javascript'>
  window._tfa = window._tfa || [];
  window._tfa.push({notify: 'event', name: 'page_view', id: <account_id>});
  !function (t, f, a, x) {
         if (!document.getElementById(x)) {
            t.async = 1;t.src = a;t.id=x;f.parentNode.insertBefore(t, f);
         }
  }(document.createElement('script'),
  document.getElementsByTagName('script')[0],
  '//cdn.taboola.com/libtrc/unip/<account_id>/tfa.js',
  'tb_tfa_script');
</script>
<!-- End of Taboola Pixel Code -->
Params
<account_id>- Replace each occurrence (above) with your numeric Taboola Account ID.For a prefilled code snippet, see: Tips & Techniques (below)
Logical page view
In SPAs, the page URL does not change across different pages. As such, you need to pass an item-url parameter to notify Taboola which page the user is viewing.
For each state in your code that marks a logical page view, fire a page_view event, and pass an item-url param with the relevant URL:
_tfa.push({notify: 'event', name: 'page_view','item-url': '<your_url>', id: <account_id>});
Params
<your_url>- Replace with the actual URL string for this logical page view e.g. by passingwindow.location.href.(If your SPA uses hash routing, make sure to incude the hash fragment.)
<account_id>- Replace with your numeric Taboola Account ID.
Using Google Tag Manager?If you're using the Taboola Pixel GTM template, you can use the
item-urlfield to specify a custom page URL for yourpage_viewcalls. See Add event pixels in GTM for more information.
Event-based tracking
If all else fails, consider using an event-based conversion instead of a URL-based conversion:
- In Realize, create an event-based conversion rule with event name
view_content. - Fire a
view_contentevent each time navigation occurs:
_tfa.push({notify: 'event', name: 'view_content', id: account_id});
When should I use this approach?Only use this approach if you cannot detect a logical page view (above).
What's next?
Now that you have added the base pixel, make sure to:
- Add event pixels.
- Verify that your pixels are running smoothly.
Tips & techniques
Copy a prefilled code snippet (or send it via email)
To copy a prefilled code snippet (or send it via email):
-
Open Realize, and select the account (top, left) that you will use to track conversions.
-
In the sidebar (left), select
Tracking. -
Click on
Tracking Setup(top, right):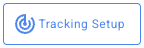
-
Select
Manually install the Taboola Pixel, and clickContinue. -
Mouse over the code snippet and click on
COPY TO CLIPBOARD.
To send an email with all your code snippets, continue below.
- Scroll down to the
Email instructionsblock. - Click on the
Select Email Addressbutton and follow the instructions provided.
Obtain your Account ID
To obtain your numeric Taboola Account ID:
-
Open Realize, and select the account (top, left) that you are using to track conversions.
Make sure to select the Taboola account that you are using to track conversions.
Network Pixel:
For network-level conversions, you must create conversions under your Network Account in Realize (top, left).
Note that all sub-accounts in your network can use the conversion rules and audiences created at the network level.
Learn more: Network-level conversions
-
In the sidebar (left), select
Tracking. -
Copy the numeric
Account IDon the screen (top, left):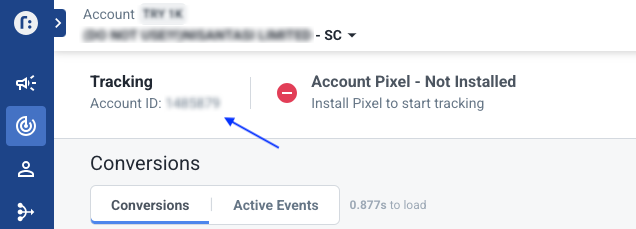
Updated 6 months ago