Codeless conversions
Overview
The codeless conversion tool allows you to create and manage conversions in Realize without the need to touch code or configure a tag manager.
Before you startBefore you begin, make sure that the Taboola base pixel is installed on your page.
WordPress site owners can use our WordPress plugin to install the base pixel.
Base pixel coverageThe base pixel must be installed on every page you want to track, including subdomains and additional domains.
Online store owners
- Shopify store owners should use our Shopify app to track standard events.
You can still use the codeless tool for custom pages or events on your Shopify site.
- WooCommerce store owners should use our WooCommerce plugin to track standard events.
You can still use the codeless tool for custom pages or events on your WooCommerce site.
- Use the codeless tool for other stores. However, do not use it to track purchase events.
(The codeless tool is unable to track server-side validations that may cause the purchase to fail.)
Technical limitations
- When tracking form submissions, we support any validation as long as the form is built according to best practice.
- Some
<iframe>elements may not be detectable, depending on how they were implemented.- You cannot track events in heyflow forms.
The tool does not interact with elements in a Shadow DOM, hence this limitation.
Open the codeless conversion tool
-
Open Realize, and select the account (top, left) that you will use to track conversions.
-
In the sidebar (left), select
Tracking. -
Click on
New Conversion(top, right). SelectCodeless event tooland click onContinue. -
Enter the URL of the page to create conversions.
The page entered must contain a base pixel for your account.
-
If the tool fails to detect your base pixel, a warning message appears.
Make sure that your base pixel is installed. If it is present, and the warning persists, click on
Continue anyway. -
The tool opens the URL provided (in a new tab) and displays a loading message while it analyzes the page.
If the loading message does not appear, disable any ad blockers, and reload the page.
(If the message still does not appear, check that the base pixel is installed.)
Else - if the loading message continues indefinitely, reload the page.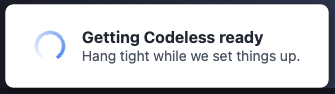
-
When the loading completes, the
Conversion Setupwindow appears, with a list of page events.Use the handlebars
 (top, left) to drag and resposition the window.
Or use the minimize icon
 (top, right) to collapse it.

-
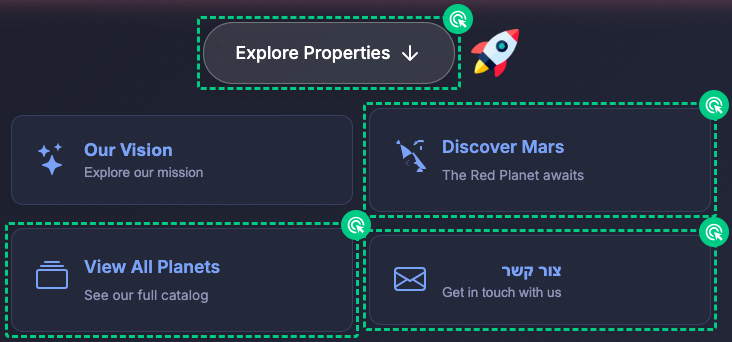
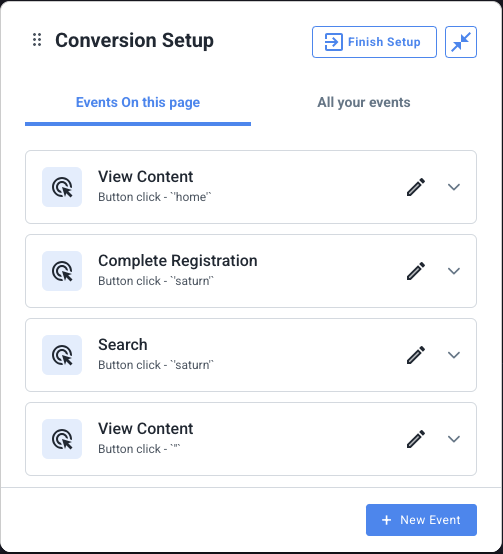
Elements on the site that have been tagged with events are marked with a dotted green line.
In the example below, 4 elements have been tagged with events:
-
You can now create new events or edit existing ones, as described in the sections that follow.
Create an event
This section describes how to create a click event. Similar steps can be used to create a browse event.
-
Open the codeless conversion tool (as described in the first section).
-
In the
Conversion Setupwindow, click onNew event(bottom, right):
-
Select your desired conversion type - e.g.
Button click- and clickNext.Button click- triggered when the user clicks on a given button or link.URL visit- triggered when the user visits a given URL.This section describes the flow for a
Button click. -
Depending on your needs, select
On this pageorAcross your site.If the same call-to-action appears across multiple pages, choose
Across your site. Otherwise, chooseOn this page. -
The tool highlights all clickable elements on the page.
-
Previously tagged elements are marked with a dotted, green line.
Since these have already been tagged, they cannot be tagged again.
-
Elements available to be tagged are marked with a solid blue line.
In the following example, the
Our Visioncard, and the rocket logo are available to be tagged: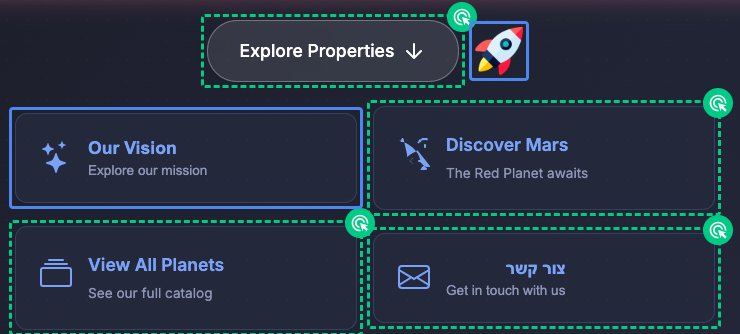
-
-
Click on an element (marked in blue) to select it.
You can continue selecting additional elements for this conversion - e.g. if the same conversion can be triggered from multiple elements on the page.
-
Once you have completed your selection(s), click on
Finish selection(at the bottom of the page). -
The
New eventwindow displays: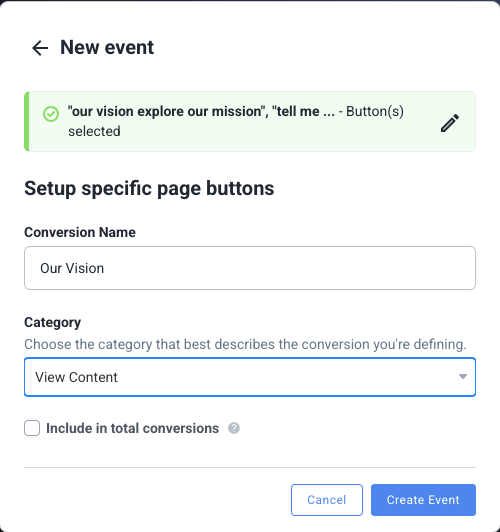
-
Enter a
Conversion name.This is a descriptive name for your convenience.
The conversion name that appears in Realize will be based on this field.
-
Select a
Categoryfor the event (e.g.,View Content,Lead). -
Decide if you want to
Include in total conversions.When checked, this conversion will be included in total conversion counts and used by the Taboola algorithm for campaign optimization. Uncheck this for secondary conversions that you want to track but not optimize toward.
-
Review your chosen settings, and click on
Create event(bottom, right).Optionally repeat the above steps to create as many events, as needed.
-
Click on
Finish Setup(top, right). -
A
Review Changeswindow appears with a list of all recent changes: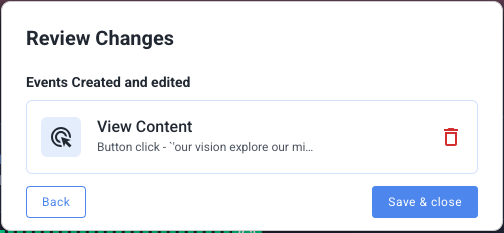
-
Once you have reviewed the changes, click on
Save & closeto publish your changes and exit the tool.
TipAllow a few minutes for the new conversion to become available. If it does not show up in the Conversions list in Realize, refresh the page.
General notes
Important: Do not use Google TranslateDo not use Google Translate when setting up codeless conversions. Rather, set up the conversions in the language your site uses (otherwise the events will not be triggered).
Button groupingButtons with the exact same definitions across your site will be grouped and triggered together. This allows you to track the same conversion action from multiple locations.
Advanced settingsYou can further edit the conversion in Realize if needed to change advanced settings such as attribution windows. Navigate to
Tracking>Conversionsand edit the conversion rule.
View, delete or edit an event
-
Open the codeless conversion tool (as described in the first section):
-
To view event details - or delete the event - click on the arrow
 to expand.
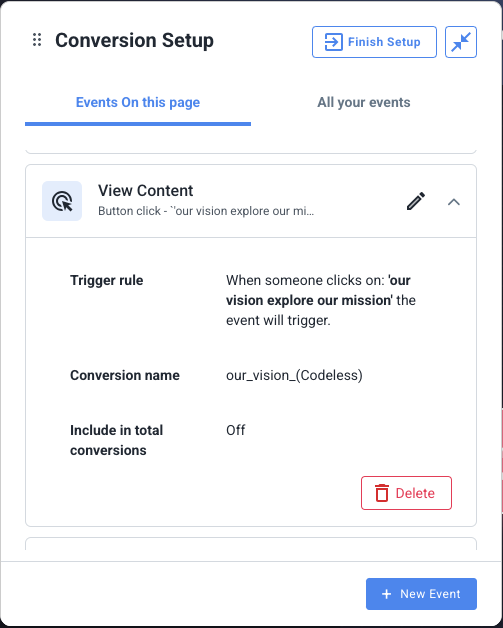
The following example illustrates the expanded view:
-
Note the following event details:
- Title - e.g.
View Content- indicates the event category. - Subtitle - e.g.
Button click - our vision explore our mis...Button click- describes the event type.our vision explore our mis..- shows the text that appears on the element.
Trigger rule- a human-readable description of the trigger rule.Conversion name- e.g.our_vision_(Codeless)- the conversion name that appears in Realize.
- Title - e.g.
-
To delete the event, click on the
Deletebutton (bottom, right). -
To edit the event, click on the
Editicon (alongside the title).
 -
From this point onward, the steps are very similar to creating a new event. For more detail, refer to the previous section.
-
Once you have finished creating, editing, and deleting events, click
Finish setup. -
Finally, click
Save and closeto apply the changes and exit the tool.
Troubleshooting
Tool fails to load
Issue
The loading message does not appear.
Resolution
Try the following steps in order. After each step, reload the page and test again:
- Disable any ad blockers.
- Look for a cookie consent banner on the site, and accept all cookies. (Cookie banners can prevent the base pixel from loading, which causes the tool to fail.)
- Check that the base pixel is installed, and that the Account ID matches the Realize account that you are using to create conversions.
- Check for CSP violations (see below).
Issue
The loading message continues indefinitely.
Resolution
Reload the page.
Content Security Policy (CSP)
Issue
The browser console shows CSP violations (e.g., "Refused to load the script 'https://ads.realizeperformance.com/...' because it violates the following Content Security Policy", or similar).
Resolution
- Ask your team to whitelist
ads.realizeperformance.comin your site's Content Security Policy headers (by addingads.realizeperformance.comto thescript-srcdirective). - If the issue persists, contact your Taboola account manager for assistance.
Double-counting
Issue
Events are tracked twice.
Resolution
Make sure that you have not used both the codeless tool and manual code snippets for the same conversion event.
Translation/Language Issues
Issue
Rules created in one language don't work in another language.
Resolution
Never translate the page during Codeless setup. Rules are saved with specific language text and won't work in other languages.
Site Structure Changes
Issue
Buttons are no longer marked with green borders in Codeless, or previously working rules stop working.
Resolution
If your site structure has changed (e.g., button classes, IDs, or HTML structure), you may need to recreate the affected rules in Codeless. The selectors used to identify elements are based on the page structure at the time the rules were created.
Forms
Issue
Form submissions are not being tracked, or the tool cannot detect form elements.
Resolution
- Make sure your form is built according to best practice. We support any validation as long as the form follows standard HTML form practices.
- Some
<iframe>elements may not be detectable, depending on how they were implemented. - You cannot track events in heyflow forms. This limitation is by design, as the tool cannot interact with elements in a Shadow DOM.
What's next?
Well done - you have successfully created codeless conversions!
Next, it's time to test that your conversions are working smoothly.
Updated 5 months ago