Web Push (Manual integration)
You are viewing the manual integration doc. For the WordPress Plugin doc, see here.
Overview
Taboola Web Push allows you to re-engage and monetize visitors, even when not on your website.
To receive notifications, users can opt in via a 1-click subscription flow.
End-to-end flowGetting started
- Reach out to your Taboola Account Manager for your Web Push accounts.
Integration
- Integrate Web Push for a given domain.
- Integrate Web Push for given pages in that domain.
- (Optional) Implement additional features.
Getting started
Web push accounts
To get started, reach out to your Taboola Account Manager for your Web Push accounts.
Which accounts?Your Taboola Account Manager will provide new accounts (one account per domain).
You cannot re-use your existing Taboola accounts.
Daily reports
A daily report of your Web Push activity will be provided to the relevant email address(es).
Integration
Already have a service worker?Make sure to look at the guidelines provided below.
Step 1: Integrate Web Push for a given domain
- Create a file called
sw.jsthat contains a single line of code:
importScripts("https://cdn.taboola.com/webpush/tsw.js"); - Upload
sw.jsto the root of the domain. - Verify that
sw.jswas uploaded successfully:- Using a browser, enter your domain path, followed by
"sw.js".E.g.
https://mydomain.com/sw.js - Check that the contents of
sw.jsdisplay in your browser. You should see a single line of code:
importScripts("https://cdn.taboola.com/webpush/tsw.js");
- Using a browser, enter your domain path, followed by
File names
- The name of the file is
sw.js.- The path within the file points to
tsw.js.The above 2 file names are intentionally different, and should not be changed.
Already have a service worker?
If your website already has a service worker, follow these guidelines:
-
Place your service worker code in a file called
sw.js, located on the root of your domain.Need to use a custom path? See below: (Optional) Set a custom service worker path
-
Add the following line at the end of
sw.js:// Your service worker code here... importScripts("https://cdn.taboola.com/webpush/tsw.js");
Step 2: Integrate Web Push for pages in that domain
Now that you have integrated Web Push for the domain, you need to integrate it for the relevantpages under that domain.
- In the
<head>section of the page, add the following<script>:Make sure to include an
asyncattribute.
<!-- Replace the {publisher_id} placeholder with your actual Publisher ID e.g. 123456: -->
<script async src="https://cdn.taboola.com/webpush/publishers/{publisher_id}/taboola-push-sdk.js"></script>
Publisher IDReplace
{publisher_id}with your domain-specificpublisher_id.For example, if your
publisher_idis123456:src="https://cdn.taboola.com/webpush/publishers/123456/taboola-push-sdk.js"The
publisher_idis a unique, numeric identifier, provided by Taboola.When editing the above URL, make sure to remove the curly braces.
(Optional) Set a custom service worker path
By default, the SDK presumes that the service worker is located at /sw.js. To specify a different path (e.g. if your service worker is hosted elsewhere, or if the filename includes versioning), set the swPath property in the page <head>:
<script>
  window._taboola_notifications = window._taboola_notifications || [];
  window._taboola_notifications.push({ swPath: '/custom-sw.js' });
</script>You should add the above snippet before
taboola-push-sdk.js.
Step 3: Update ads.txt for sponsored push notifications
If you are using sponsored push notifications, update ads.txt appropriately.
Step 4: Additional features
You can optionally implement additional features - e.g. a backdrop effect.
See: additional features.
A sample page
For reference, a sample page is provided:
<!-- The push permission prompt will display on page load. -->
<html>

<head>
  <title>Test Page</title>
  <!-- Replace the {publisher_id} placeholder with your actual Publisher ID e.g. 123456: -->
  <!-- src="https://cdn.taboola.com/webpush/publishers/123456/taboola-push-sdk.js" -->
  <script async src="https://cdn.taboola.com/webpush/publishers/{publisher_id}/taboola-push-sdk.js"></script>
</head>

<body>
  <h1>Test Page</h1>
</body>

</html>
<!-- The push permission prompt will display on page load. -->
<html>
<head>
<title>Test Page</title>
<script>
window._taboola_notifications = window._taboola_notifications || [];
window._taboola_notifications.push({ swPath: '/custom-sw.js' });
</script>
<!-- Replace the {publisher_id} placeholder with your actual Publisher ID e.g. 123456: -->
<!-- src="https://cdn.taboola.com/webpush/publishers/123456/taboola-push-sdk.js" -->
<script async src="https://cdn.taboola.com/webpush/publishers/{publisher_id}/taboola-push-sdk.js"></script>
</head>
<body>
<h1>Test Page</h1>
</body>
</html>
publisher_idMake sure to fill in your own
publisher_id, as indicated by the code snippet comment.
Browser guidelines
Supported browsersTaboola Web Push works in any browser that supports the Web Push API - e.g.:
Desktop - Chrome, Firefox, Opera and Edge.*
Mobile - Chrome, Firefox, Opera, Samsung Internet Browser and UC Browser.*For an up-to-date list of supported browsers, check online resources, such as caniuse.com.
Testing guidelines & tips
Recommended rollout planBefore rolling out to an entire site, consider starting with a test page:
- Perform the integration on a test page under the desired domain.
- Contact Taboola to verify the integration.
- Once your integration has been verified by Taboola for a test page, repeat it for all relevant pages in that domain.
Tip: How to test a page multiple timesTo test-drive the same page multiple times on Google Chrome (without using BrowserStack, or similar):
- Open the test page.
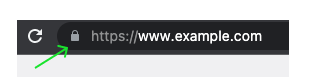
- Click on the
View site informationicon, on the left side of the address bar:
- Click on
Reset permissions(underNotifications).- Reload the page.
- The above instructions apply to Google Chrome. (For other browsers, refer to your browser documentation.)
- When testing, make sure that you do not have an ad blocker enabled.
What's next?
If you have not already done so, take a look at our additional features.
Updated 9 months ago