GTM (Google Tag Manager)
IMPORTANTGoogle Tag Manager can serve as a convenient way to test-drive a Taboola integration , without any development. However, it is not recommended as a long-term solution.
Whenever possible, consider using an alternative method - e.g. standard integration (aka JS Tag integration).
Supported browsers
Taboola's integration is supported for any browser that is fully compatible with ES5 (ECMAScript 5) or higher. This includes all modern web browsers.
Older browsers (such as IE 11) may encounter problems with video ads.
Basic Flow - Add a single tag
This section describes how to add a single tag (and trigger) for Taboola.
If you have different Taboola code snippets for different devices, then see below:
Your Google Tag Manager version might differ from the one described here.
For support with Google Tag Manager, refer to Google's official documentation.
Set up the tag
-
Open Google Tag Manager.
-
In the
Container Namecolumn (left), click on the relevant container. -
If you use multiple workspaces, choose a
CURRENT WORKSPACE(top, left):
-
In the navigation panel (left), select
Tags: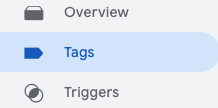
-
Click on
New(top, right):
-
The default name (top, left) for the new tag is
Untitled Tag .
.Rename it to something more descriptive.
Tip: Consider using the same name as the
placementparam provided by Taboola. (For information about params, see Advanced Options.) -
Click on the
Tag Configurationcard, and selectCustom HTMLfrom the options provided. -
Paste in the code snippet provided to you by Taboola.
To create/edit the code snippet yourself, see Advanced Options.
-
Click on the
Triggeringcard (below the code snippet field), and configure a trigger for this tag.E.g.
All pages>Page View. -
Click on
Save(top, right).
Do not add multiple GTM tags (with the same trigger) for the same page. Doing so will prevent Taboola recommendations from displaying.
Test and deploy
- To test drive your latest changes (without actually deploying them):
- Select the new tag from the list, using the checkbox provided.
- Click on Preview (top, right) - and follow the prompts provided by Tag Assistant. Your website will be loaded in debug mode.
- Once you are ready to deploy, return to the Tag Manager workspace and:
- Select the new tag, using the checkbox provided (on the left).
- Click on Submit (top, right) - and follow the prompts.
What's Next?
- For a more advanced flow, see the next section.
- In order to provide personalized recommendations for impressions in the EU and California, make sure to implement GDPR and CCPA consent.
- If you have not already done so, configure ads.txt.
- To create/edit a Taboola code snippet yourself, see Advanced Options.
- Contact Taboola so that we can verify your Taboola integration.
Complex flow - Add a tag for each device type
Sometimes, you may want a separate tag and trigger within Google Tag Manager for each device type. For example, if you have separate Taboola code snippets for desktop and mobile.
This section describes one possible approach.
General flowUsing Google Tag Manager:
- Create a user-defined variable that returns the device type:
"desktop","tablet"or"mobile".- Create a separate tag for each device type, each with its own device-specific Taboola code snippet.
- Using your user-defined variable, configure a separate trigger for each tag.
Your Google Tag Manager version might differ from the one described here.
For support with Google Tag Manager, refer to Google's official documentation.
Step I - Create a user-defined variable
- Open Google Tag Manager and select the relevant workspace.
- In the navigation panel (left), select Variables. Then click on the New button (top, right).
- At the top of the window provided, fill in a name for the new user-defined variable.
E.g.
Screen Type. - Click on the Variable Configuration card, and select Custom JavaScript from the options provided.
- Paste the following code snippet into the field provided:
function () {
  var width = window.innerWidth;
  var screenType;
  if (width <= 520) {
    screenType = "mobile";
  } else if (width <= 820) {
    screenType = "tablet";
  } else {
    screenType = "desktop";
  }
  // console.log("screenType: " + screenType);
  return screenType;
}- Click on Save (top, right).
Step II - Create a trigger for each device type
- Open Google Tag Manager and select the relevant workspace.
- In the navigation panel (left), select Triggers. Then click on the New button (top, right).
- At the top of the window provided, fill in a name for the new trigger.
E.g.
Desktop Device(orTablet DeviceorMobile Device). - Click on the Trigger Configuration card, and select Some Page Views. Then fill in the fields provided:
- In the first field, select your user-defined variable - e.g.
Screen Type. - In the second field, select
equals. - In the third field, type
desktop(ortabletormobile)
- In the first field, select your user-defined variable - e.g.
Step III - Create a tag for each device type
For each device type (desktop, tablet and mobile), perform the following steps:
Repeat these steps for each device type.
- Open Google Tag Manager and select the relevant workspace.
- In the navigation panel (left), select Tags. Then click on the New button (top, right) - or edit an existing tag.
- At the top of the window provided, fill in a name for this tag.
E.g.
USER.PLACEMENTNAME - Desktop(orUSER.PLACEMENTNAME - TabletorUSER.PLACEMENTNAME - Mobile) - Click on the Tag Configuration card, and select Custom HTML from the options provided.
- Paste in the device-specific code snippet provided to you by Taboola.
To create/edit the code snippet yourself, see Advanced Options.
- Click on the Triggering card (below the code snippet field), and configure a trigger for this tag.
E.g.
Desktop Device(orTablet Device orMobile Device`). - Click on Save (top, right).
After repeating the above steps for each device type, you should now have 3 tags - 1 tag per device type.
Step IV - Test and deploy
- To test drive your latest changes (without actually deploying them):
- Select the new tag(s) within the list, using the checkboxes provided.
- Click on Preview (top, right) - and follow the prompts provided by Tag Assistant. Your website will be loaded in debug mode.
- To test different screen sizes:
- Open Chrome Dev Tools and activate the device toolbar (top, left in the Dev Tools pane):

- Select the desired device (above the preview pane) and reload the page.
- Open Chrome Dev Tools and activate the device toolbar (top, left in the Dev Tools pane):
- Once you are ready to deploy, return to the Tag Manager workspace and:
- Select the new tag(s) within the list, using the checkboxes provided.
- Click on Submit (top, right) - and follow the prompts.
What's Next?
- In order to provide personalized recommendations for impressions in the EU and California, make sure to implement GDPR and CCPA consent.
- If you have not already done so, configure ads.txt.
- To create/edit a Taboola code snippet yourself, see Advanced Options.
- Contact Taboola so that we can verify your Taboola integration.
Updated 10 months ago