Flutter Plugin (Beta)
You are viewing the v0 docs.
Note that v1 is now in GA, and is the preferred version for Flutter integrations.
Example App
Take a look at our Flutter example app on github.
Step 1: Dependencies & Permissions
General
- You can incorporate the Taboola package from the following pub.dev
https://pub.dev/packages/taboola_sdk
- In your project’s
pubspec.yaml, under ‘dependencies:’, add:
taboola_sdk: 0.3.0
- Don't forget to turn off the Taboola logs before uploading your app to the Google Play / App Store
Taboola.setLogsEnabled(true);
Running The Flutter App
To run the Flutter app on versions 2.x and above, use the "--no-sound-null-safety" flag. For example: "flutter run --no-sound-null-safety"
Android
Add permissions in your relevant AndroidManifest.xml, above the <application> tag, add
<uses-permission android:name="android.permission.INTERNET"/>
<!-- Please add the following permission to allow Taboola to deliver personalized content, using Google's AdvertisingId (according to Google's policy update: https://support.google.com/googleplay/android-developer/answer/6048248) -->
<uses-permission android:name="com.google.android.gms.permission.AD_ID"/>
iOS
Add permissions in your relevant Info.plist add the following between the <plist> tags:
<key>NSAppTransportSecurity</key>
    <dict>
        <key>NSAllowsArbitraryLoads</key>
        <true/>
        <key>NSAllowsArbitraryLoadsInWebContent</key>
        <true/>
    </dict>
Step 2: Init Taboola
Important note about using 'webview_flutter' with Taboola
- In case you are using the 'webview_flutter' plugin and its default Platform Views rendering methods, please check if Taboola integration is causing you rendering issues.
- Taboola Widget requires the Hybrid Composition rendering method and, unfortunately, the 'webview_flutter' plugin requires switching render mode in a global way.
- Our recommended approaches to this issue: Make sure to create all your WebViews before creating Taboola Widgets. 'webview_flutter' plugin will keep your existing WebViews in their existing render methods and only change Taboola's WebViews to Hybrid Composition."
- Import Taboola to your project
import 'package:taboola_sdk/taboola.dart';
- Create a
PublisherInfoobject, passing your Taboola Publisher ID:
PublisherInfo publisherInfo = PublisherInfo(<publisherId>);
publisherId- Your Taboola Publisher ID.A unique, alphabetic string, provided to you by Taboola.
- Execute the
initfunction with thePublisherInfoobject
Taboola.init(publisherInfo);
Step 3: Add Taboola to the build stack
Import the relevant components
import 'package:taboola_sdk/classic/taboola_classic_listener.dart';
import 'package:taboola_sdk/classic/taboola_classic.dart';
import 'package:taboola_sdk/taboola.dart';
Obtain a TaboolaStandard Instance
- Get an instance builder
TaboolaClassicBuilder taboolaClassicBuilder = Taboola.getTaboolaClassicBuilder(
                                        <pageUrl>,
                                        <pageType>
                                      );
Params
pageUrl- A public, fully-qualified URL that reflects the current screen's content.pageType- The relevant page type, as provided by Taboola.
- Add the Taboola unit
TaboolaClassicUnit taboolaClassicUnit = taboolaClassicBuilder.build(
                            <placement>,
                            <mode>,
                            <isFeed>,
                            <taboolaStandardListener>,
                            <viewId>,           // For a single unit, this param is optional
                            <scrollController>, // Optional (See 'Special cases')
                            <keepAlive>         // Optional (Used with ListView. Default = false)
                          );
Params
placement- Your placement param, as provided by Taboolamode- Your mode param, as provided by Taboola.isFeed- Determines which Taboola unit is returned:
- Pass
falseto obtain a limitedTaboolaWidgetfor mid-page or page-bottom.- Pass
trueto obtain an unlimitedTaboolaFeedfor page-bottom.TaboolaStandardListener- You will create theTaboolaStandardListenerin the next step.viewID- A unique, numeric string (e.g. the current epoch timestamp).
- When adding multiple Taboola units to the same screen, pass the same
viewIdfor each unit. See: Multiple Taboola units on a screen- If you have a single Taboola unit on the screen, this param is optional.
scrollController- (Optional) Your own ScrollController
- When needed, pass your own
ScrollController- see below: Special cases- If you do not pass a
ScrollController, the Taboola SDK will create one, and expose it via the unit'sscrollControllerproperty.- A limited Taboola unit (aka
TaboolaWidget) does not need a customScrollController.keepAlive- (Optional) Allows you to persist Taboola units in aListView.
- Default =
false- Pass
trueto ensure that the Taboola unit is not destroyed when scrolled offscreen.- Otherwise, scrolling back creates a new Taboola unit. This will cause new recommendations to load, and may cause a flickering effect.
Special cases
For the following special cases, refer to the instructions provided:
Step 4: Set Callbacks
Important!
Make sure to implement the
taboolaDidFailToLoadmethod to handle the event of an error or no fill.
Create a TaboolaStandardListener object to receive callbacks regarding your TaboolaStandard instance:
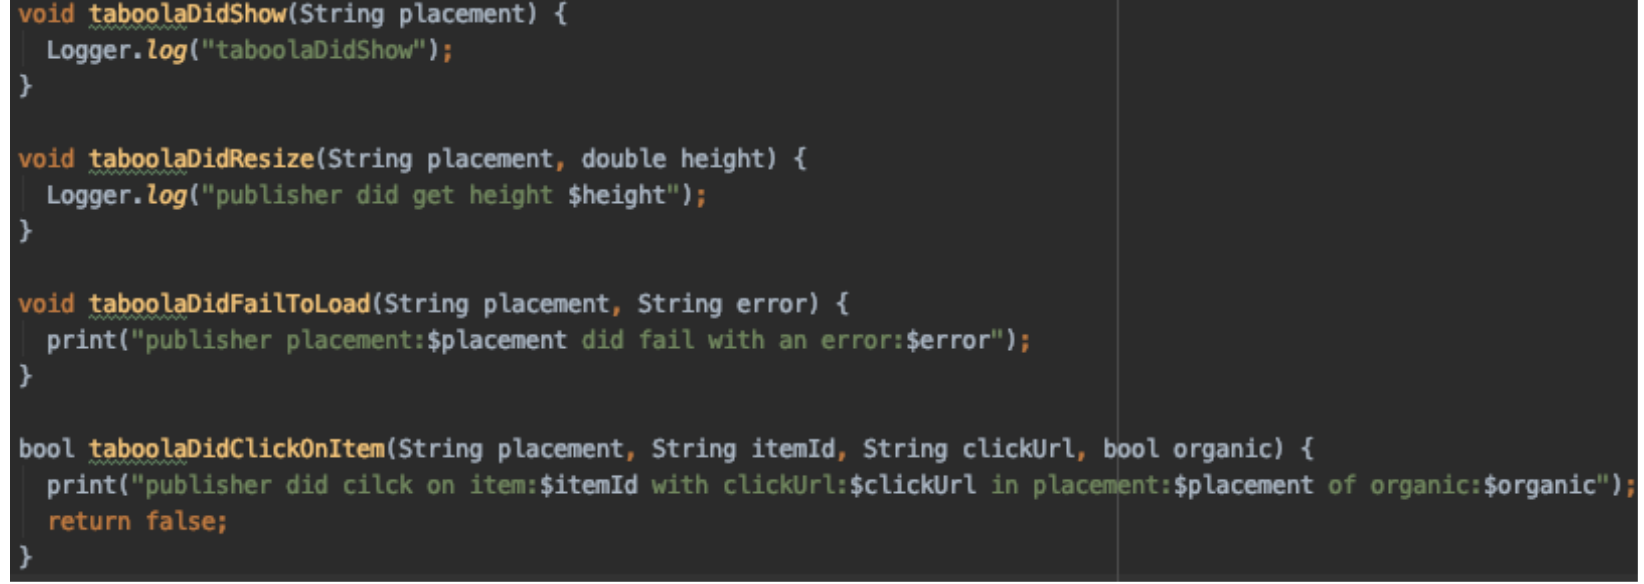
TaboolaClassicListener taboolaClassicListener = TaboolaClassicListener(taboolaDidResize,taboolaDidShow,taboolaDidFailToLoad,taboolaDidClickOnItem);
taboolaDidResize
taboolaDidResizeThis callback is called every time Taboola’s web content resizes.
Params:
- Placement: The name of the Taboola Widget.
- Height: The min. between 1 screen size & current WebView height (wraps around its web content)
taboolaDidShow
taboolaDidShow- Placement: The name of the Taboola Widget.
- General: This is called when Taboola web content starts rendering (on or off screen), treat this more like an onLoadSuccess()
taboolaDidFailToLoad
taboolaDidFailToLoadCalled when Taboola failed to display content or timed out.
Params:
- Placement: The name of the Taboola Widget.
- Error: The error message related.
taboolaDidClickOnItem
taboolaDidClickOnItemThis callback will be called when a user clicks on a Taboola item. (String placement, String itemId, String clickUrl, bool organic)
Params:
- Placement: The name of the Taboola Widget.
- ItemId: The id of the item clicked.
- ClickUrl: The url of the item clicked.
- Organic: True if the clicked item is organic, false if it’s sponsored.
Return value:
This callback also implements logic regarding who handles the user click. If you return true: Taboola will handle the click automatically. If you return false: In case of organic item/article, you will be able to handle the click yourself. Sponsored items will still be handled by Taboola at any case.
TaboolaStandardListener expects Functions as arguments

Step 5: Submit your app for review
You're done!
When you have finished the integration, contact your account manager and send a debuggable version of your Android and iOS projects. Reach out to your Taboola contact for more information
Special Cases
ListView
Guidelines
When using a
ListView, make sure to:
- Pass your own
ScrollControllerto Taboola.- Set the
keepAliveflag totrue.Detailed steps are provided below.
-
Create your own
ScrollControllerinstance:final ScrollController _scrollController = ScrollController(); -
When building your
ListView, reference yourScrollController:body: ListView.builder( controller: _scrollController, // A reference to your ScrollContoller itemCount: items.length, itemBuilder: (BuildContext context, int index) { // Your ListItem UI code here... }, ), -
When building the
TaboolaClassicUnitinstance, pass your ownScrollControllerand set thekeepAliveflag totrue:TaboolaClassicUnit taboolaClassicUnit = taboolaClassicBuilder.build( <placement>, <mode>, <isFeed>, <taboolaStandardListener>, <viewId>, yourScrollController, // Pass your own ScrollController true // Pass true );
See above: Obtain a TaboolaStandard Instance
Multiple Taboola units on a screen
It is possible to add more than one Taboola unit on the same screen such as two widgets or mid article widget and bottom article feed.
To enable this functionality properly:
- Set the same viewId value for each TaboolaClassicUnit object before rendering the widget. The viewId value
must be a string of digits of maximum 19 characters. We recommend using the current epoch timestamp. - Fetch the content for the second asset only after a response is received for the first asset. Please use the
'taboolaDidShow' callback of the 1st asset to initiate rendering for the 2nd unit. - Pass your own
ViewController, as described for ListView (above).
For full implementation details, see our example app.
Nested scrolling
If you have your own custom ScrollController, please set it in the optional argument when building TaboolaStandard instance
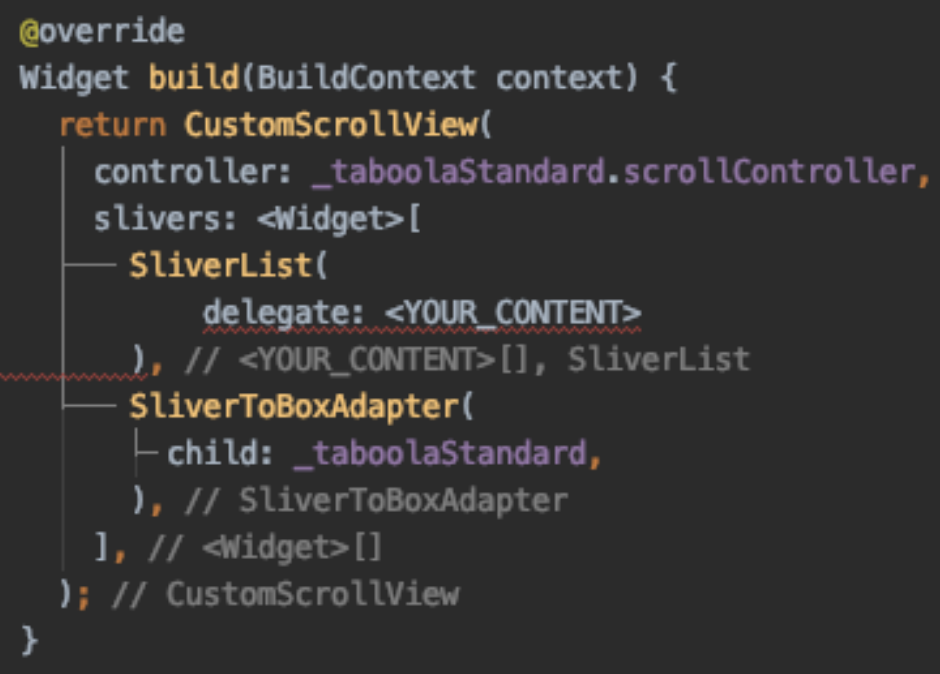
When adding “Taboola Feed” into a screen below a scrollable Widget. Taboola’s best-suggested practice is as followed:
- Create a CustomScrollView
- Set Taboola’s ScrollController as the CustomScrollView’s controller. This will allow Taboola to transfer scrolling between its Feed and your content.
- Add your content into a SliverList.
- Add your TaboolaStandard instance as a child of a SliverToBoxAdapter.
If you have your own custom ScrollController, please set it in the optional argument when building TaboolaStandard instance
Code Samples:
_taboolaClassic = taboolaClassicBuilder.build(placement, mode, true, _taboolaStandardListener, <YOUR_SCROLL_CONTROLLER>);

GDPR & CCPA
Taboola Flutter plugin can get a direct signal for the current user about the GDPR and CCPA status.
Currently, the plugin does not support the IAB CCPA, TCFv1, and TCFv2 frameworks
GDPR
It is possible to forward the consent status to Taboola plugin on when using a dedicated flag - cex. The consent boolean value (in string format) should be passed on each session.
By default, the value of this flag is set to "true" - allowing Taboola to use the user's data. Please use the flag only when the end-user is GDPR subject and set it to "true" (user-provided consent), or "false" (user didn't provide consent).
HashMap<String, dynamic> extraProperties = new HashMap<String, dynamic>(); //map has to be of <String, dynamic> structure.

extraProperties.putIfAbsent("cex", () => "true"); //or “false”

Taboola.init(PublisherInfo(publisher), extraProperties: extraProperties);
CCPA
It is possible to forward the CCPA "Do Not Sell" (dns) status to Taboola plugin on each time the widget/feed is initialized using a dedicated flag - cdns. The value (in string format) should be passed on each session.
- true - CCPA applies, and the end-user opted-out per CCPA requirements
- false - CCPA applies, and the end-user didn't opt-out per CCPA requirements
- none - CCPA does not apply (the default status)
By default, the value of this flag is set to none - the end-user is not CCPA subject, allowing Taboola to use the user's data. It is recommended to place these lines alongside the other settings, such as publisher name, etc
HashMap<String, dynamic> extraProperties = new HashMap<String, dynamic>(); //map has to be of <String, dynamic> structure.

extraProperties.putIfAbsent("cdns", () => "true"); //or “false”

Taboola.init(PublisherInfo(publisher), extraProperties: extraProperties);
Dark Mode
Dark mode is not supported by default. For dark-mode placements, contact your Taboola Account Manager.
Once Taboola has configured your dark-mode placements, you can use the following code in your application:
HashMap<String, dynamic> extraProperties = new HashMap<String, dynamic>(); //map has to be of <String, dynamic> structure.

extraProperties.putIfAbsent("darkMode", () => "true"); //or “false” if you don't wish to recieve dark mode placements

Taboola.init(PublisherInfo(publisher), extraProperties: extraProperties)
Test drive
You can use the following test parameters for your development efforts
| Parameter | Endless Feed | Widget |
|---|---|---|
| PublisherInfo | "sdk-tester-demo" | "sdk-tester-demo" |
| Placement | "Feed without video" | "Below Widget" |
| PageURL | "https://blog.taboola.com" | "https://blog.taboola.com" |
| PageType | "article" | "article" |
| TargetType | "mix" | "mix" |
| Mode | "thumbs-feed-01" | "alternating-widget-without-video-1x4" |
Contact us & Terms
If you wish to integrate the Taboola Flutter package into any commercial applications, please make sure you have a green light from your Taboola contact and from Taboola Product team
Using this Flutter package is subject to Taboola terms of use and privacy policy
Updated 3 months ago
