Taboola Push Notification plugin for WordPress
Overview
The Taboola Push Notification plugin enables you to send push notifications to your audience directly from your WordPress dashboard. Use it to notify subscribers about new content, breaking news, or scheduled campaigns.
Key features:
- Send manual push notifications immediately or schedule them for later
- Automatically send notifications when publishing posts
- Target specific apps and audience segments
- Customize notification titles, messages, and thumbnails
- Track notification status through the plugin dashboard
Push APIThe Taboola Push Notification plugin uses Taboola's Push API.
To obtain your API credentials, reach out to your Taboola Account Manager.
Install the plugin
In your WordPress dashboard:
-
In the sidebar (left), select
Plugins>Add Plugin. -
In the search box provided (top, right) type in
"Taboola Push Notification":As you type, the system automatically filters for matching plugins.
-
Locate the
Taboola Push Notificationplugin and click onInstall Now(top, right):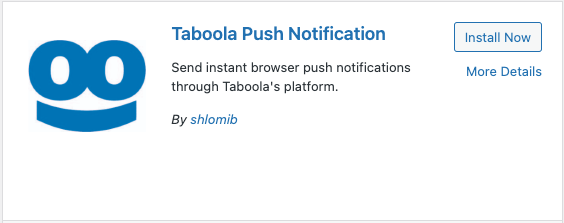
-
Once the installation has run, click on
Activate(top, right). Then follow the instructions below to configure the plugin.
The plugin dashboard
-
In your WordPress dashboard, select
Taboola Push Notification(left). The plugin dashboard displays: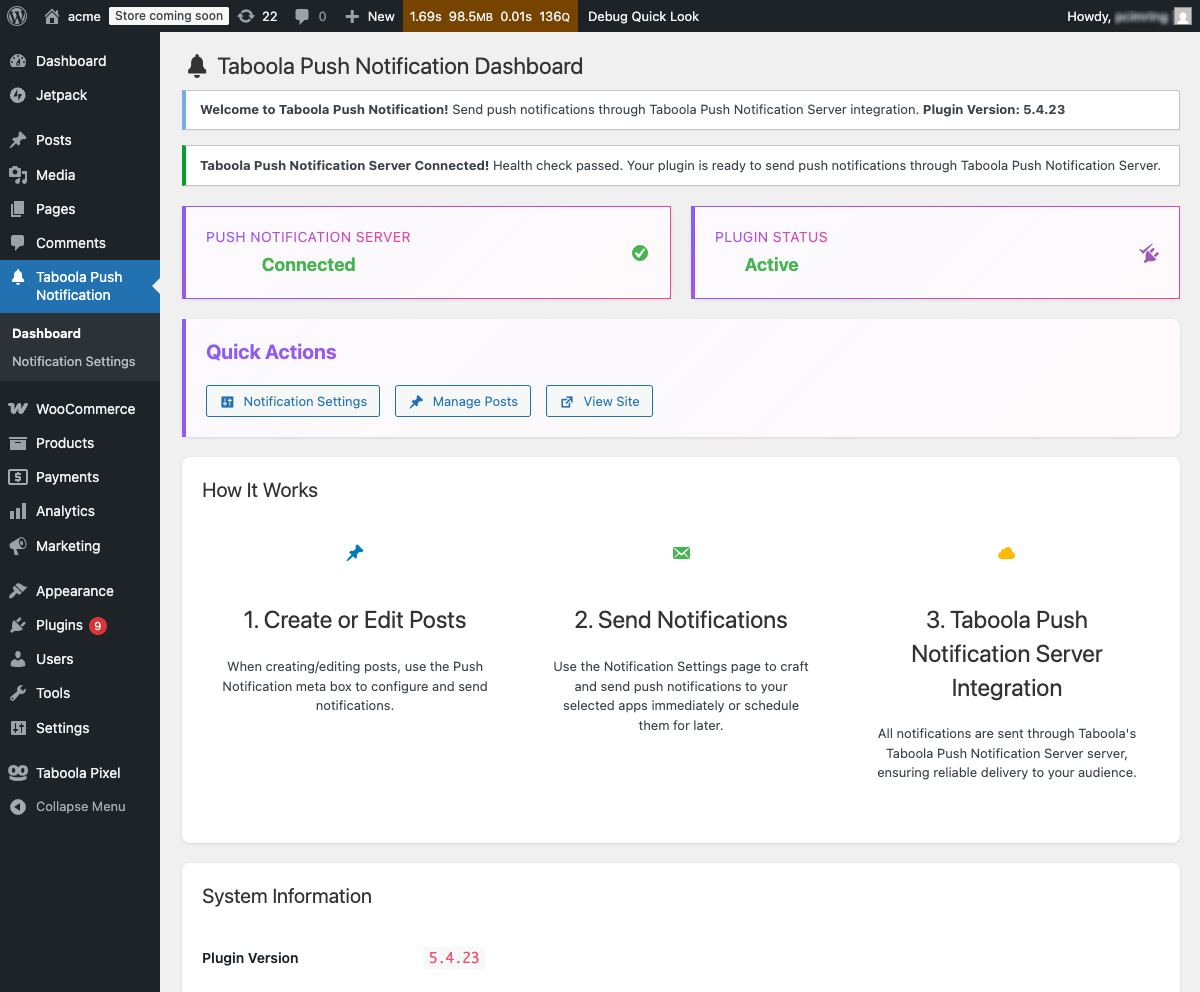
The plugin dashboard has the following sections:
Status cards section:
- Push Notification Server: Shows the server connection status
See: Configure API access below
- Plugin Status: Shows whether the plugin is active
Quick Actions section:
Notification Settings: Configure API credentials and send manual notificationsSee: Configure API access below
Manage Posts: View and edit your WordPress postsSee Send notifications from posts below
View Site: Preview your public website
How It Works section:
A 3-step guide showing the workflow:
- Create or edit posts
- Send notifications (manual or automatic)
- Taboola Push Notification Server Integration
System Information section:
- Shows system information e.g. Plugin version, WordPress version, etc.
Configure API access
- Under
Quick Actions, click onNotification Settings.
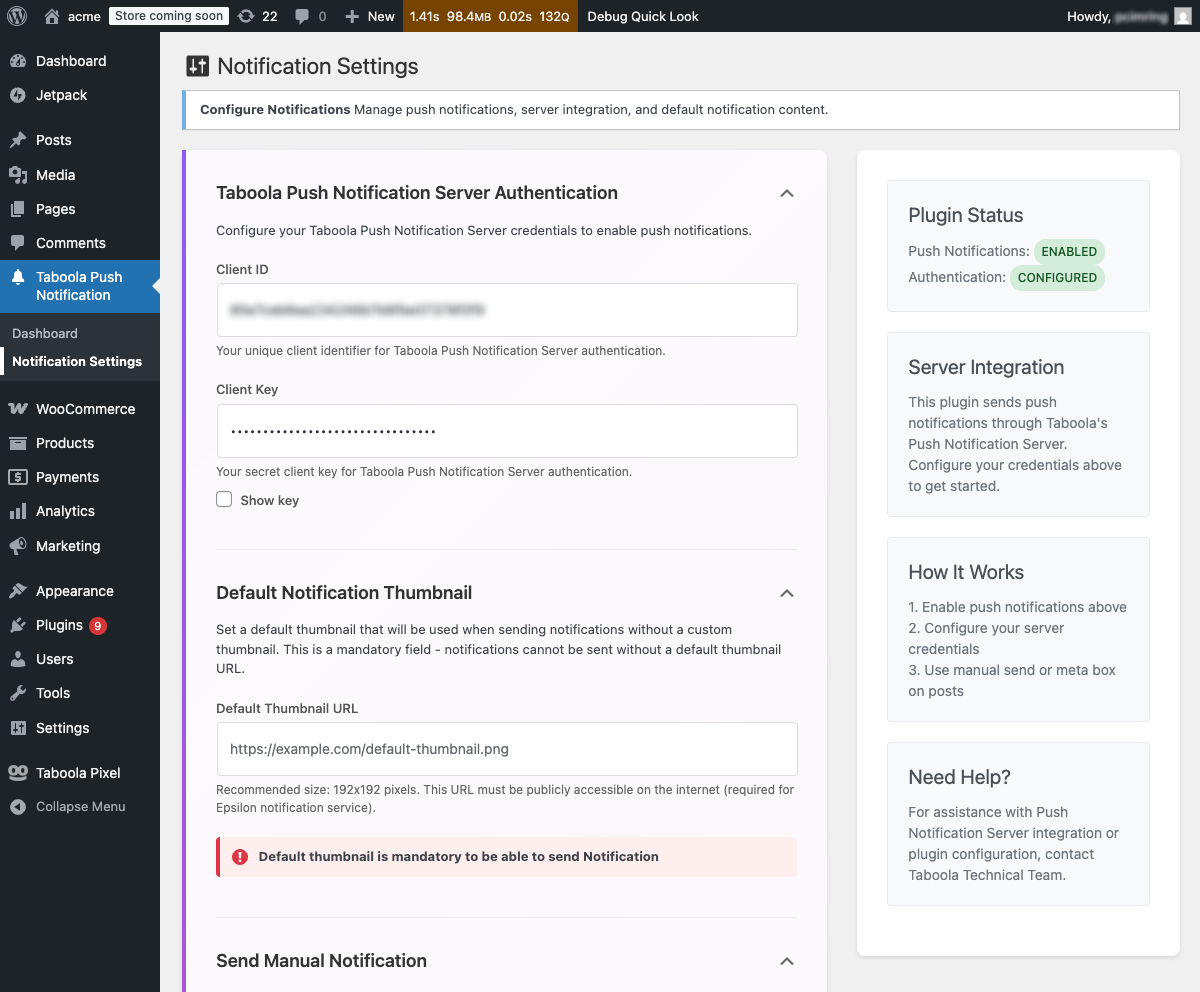
- If needed, expand the
Taboola Push Notification Server Authenticationsection. - Enter your credentials:
-
Client ID: Your Taboola client identifier -
Client Key: Your secret authentication keyTo reveal the key while entering it, check
Show key.Your
Client Keyis confidential - keep it secret.To obtain your API credentials, reach out to your Taboola Account Manager.
-
- In the
Default Notification Thumbnailsection, enter aDefault Thumbnail URL.The image URL must be publicly accessible and use
https.
Recommended image size: 192x192 pixels - Click
Save Settings.
Send manual notifications
-
In your WordPress dashboard, select
Taboola Push Notification(left). -
Under
Quick Actions, click onNotification Settings. -
If needed, expand the
Send Manual Notificationsection: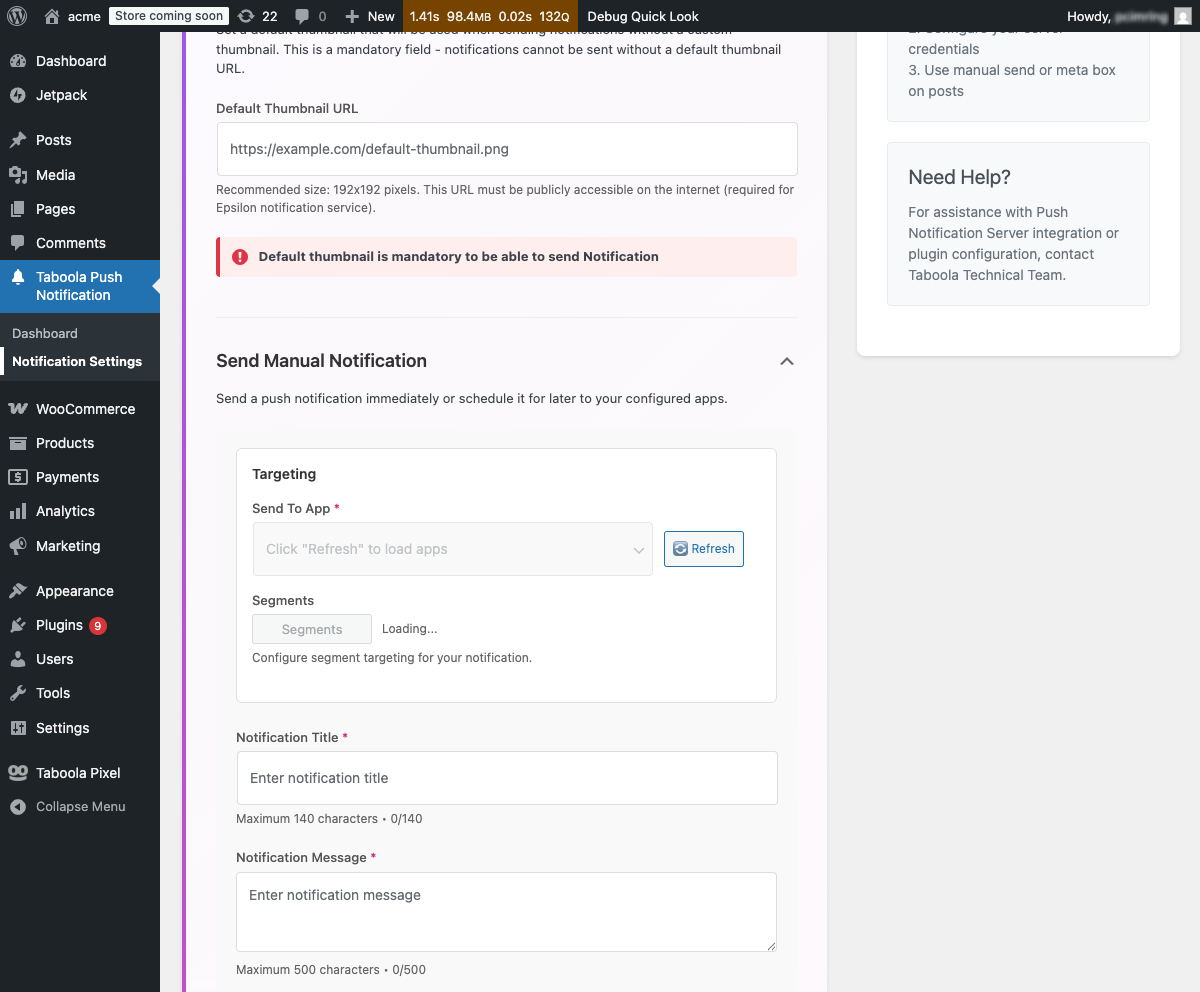
-
Configure targeting:
-
Send To App: Click 🔄Refreshto load apps, then select an app -
Segments(optional): Click to configure advanced targeting by country, language, browser, etc: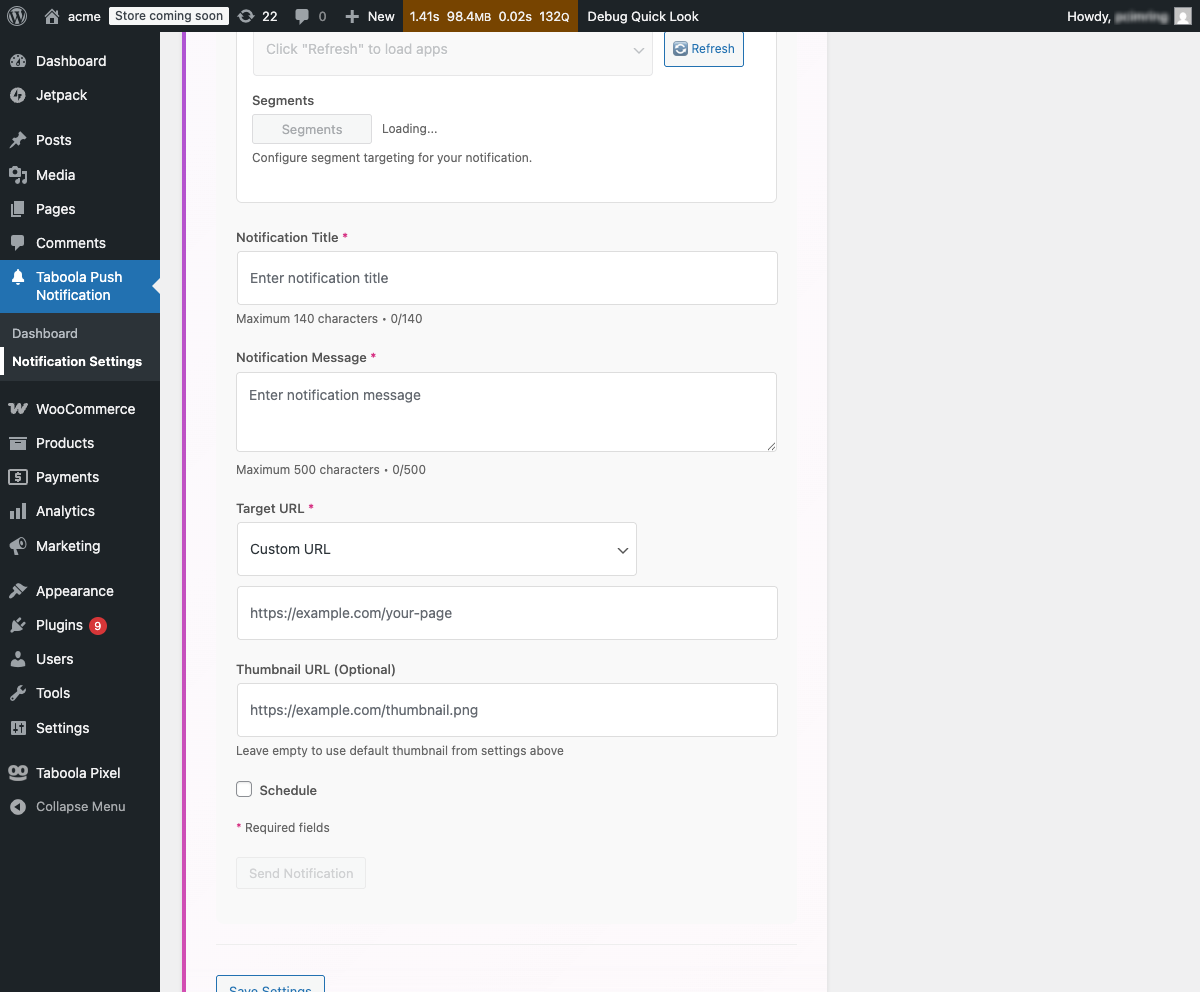
-
-
Enter notification content:
Notification Title(required, 140 characters max)Notification Message(required, 500 characters max)Target URL(required): SelectCustom URL, 🏠Homepage, or a recent post/pageThumbnail URL(optional): Custom image URL, or leave empty for default
-
To send immediately, leave
Scheduleunchecked. To schedule, checkScheduleand select a date/time. -
Click
Send Notification.
Send notifications from posts
-
Under
Quick Actions, click onManage Posts(or selectPostsin the left sidebar). -
Add a new post or edit an existing post.
-
Locate the
Taboola Push Notificationsmeta box below the editor: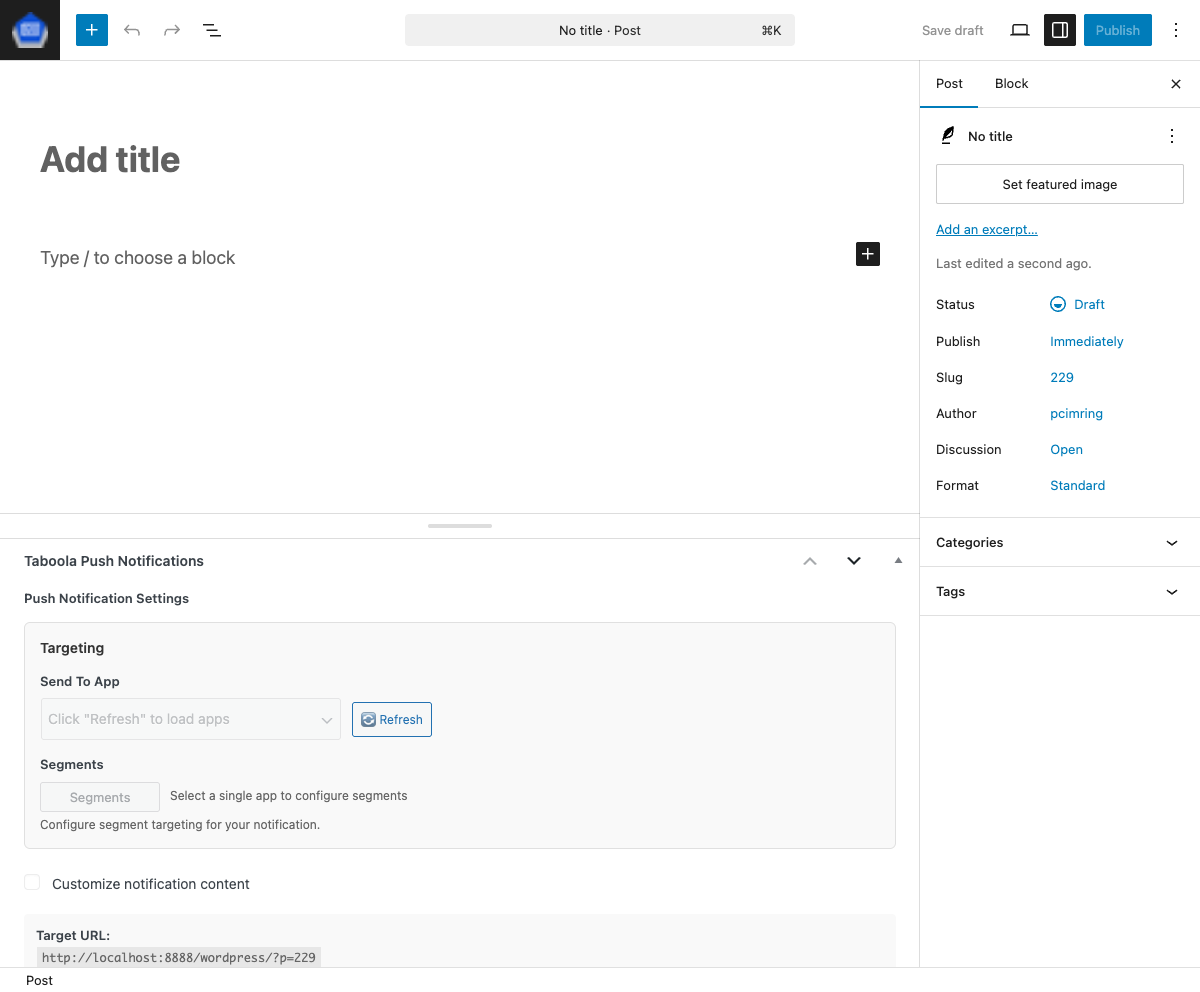
-
Configure targeting:
Send To App: Click 🔄Refreshand select an appSegments(optional): Configure advanced targeting
-
(Optional) Check
Customize notification contentto override the post title/excerpt. -
(Optional) Check
Scheduleto set a future send time. -
Publish the post. After publishing, click
Send Notification.
Automatic sendingIf you configure notification settings before publishing (without scheduling), the notification sends automatically when you publish the post.
Troubleshooting
Push notifications not working
- Verify HTTPS is enabled (required for production).
- Check
Client IDandClient Keyin settings. - Confirm
Enable Push Notificationsis checked. - Verify
Default Thumbnail URLis configured. - Check dashboard for 🟢
Connectedstatus.
Authentication errors
- Double-check
Client IDandClient Key(no extra spaces). - Click
Show keyto verify the key is entered correctly. - Contact your Taboola account manager to verify credentials are active.
Apps not loading
- Verify
Client IDandClient Keyare saved. - Click
Save Settingsbefore tryingRefresh. - Contact your Taboola account manager to verify apps are configured.
What's next?
Well done! You have successfully configured the Taboola Push Notification plugin.
For developers who need to integrate push notifications programmatically, see the Push API documentation.
Updated 8 months ago