Validation and Common Issues
After implementing the pixel, it is critical to verify that it is firing correctly.
This portal refers to the Taboola DCO solution. For the non-DCO solution, see here.
Overview
We provide multiple validation methods based on your implementation type. Choose the one that works best for your workflow:
- Browser DevTools (GTM, JS) - Most reliable method for technical users. Client side only.
- Taboola Pixel Helper - (GTM, JS) Quick browser extension check. Client side only.
- Realize dashboard - (GTM, JS, S2S) Verify events are being received (requires dashboard access). Server-to-Server and Client side as well.
- GTM debugging - (GTM) Preview mode for GTM implementations only. Client side only.
Browser DevTools validation
This method provides the most detailed view of pixel behavior and is recommended for thorough validation. Available for Google Tag Manager and Javascript integrations (client-side).
Best for technical usersThis method requires familiarity with Chrome DevTools but provides the most comprehensive validation.
Verify the base pixel
-
Open Chrome DevTools:
- Mac:
Cmd + Option + I - Windows:
Ctrl + Shift + I
- Mac:
-
Select the Network tab.
-
In the Filter field (top left), type
taboola: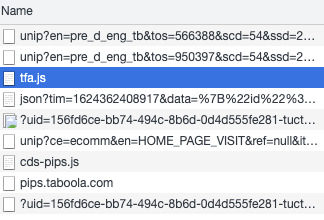
-
Browse to your website and reload the page if needed.
-
Verify that
tfa.jsis being called:
Verify e-commerce events
-
With Chrome DevTools still open, select the Network tab.
-
In the Filter field, type
unip?ce=ecomm: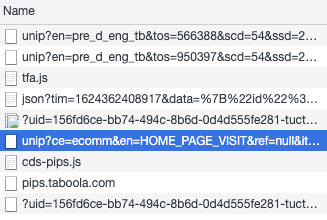
-
Perform various e-commerce operations on your website (e.g., view a product, add to cart, make a purchase).
-
For each operation, check that a corresponding network call appears with
unip?ce=ecomm:
-
Click on the entry and select the Headers tab (right panel):

-
Scroll down to the Query String Parameters section and verify that all event parameters (e.g.,
ce,en,data) are correct: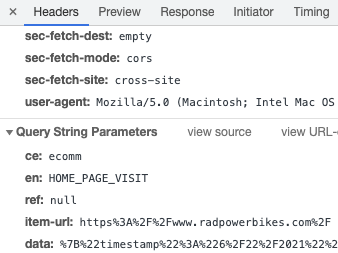
-
If the expected entry is not present, select the Console tab and check for JavaScript errors.
Pro tip: Preserve logIf the page reloads or redirects during testing, check the Preserve log option (top of Network tab) to retain network traffic across page loads.
Taboola Pixel Helper validation
Available for Google Tag Manager and Javascript integrations (client-side).
-
Add the Taboola Pixel Helper extension to your browser from the Chrome Web Store.
-
Navigate to your website and perform the actions that should trigger the events (e.g., view a product, add to cart, make a purchase).
-
Click the Taboola Pixel Helper icon in your browser's toolbar.
-
Verify that the events are firing correctly. Under
PRODUCT_VIEW(or the corresponding event), the second line should displayce=ecommafterunip?. -
If you see
ce=ecomm, the pixel is working correctly: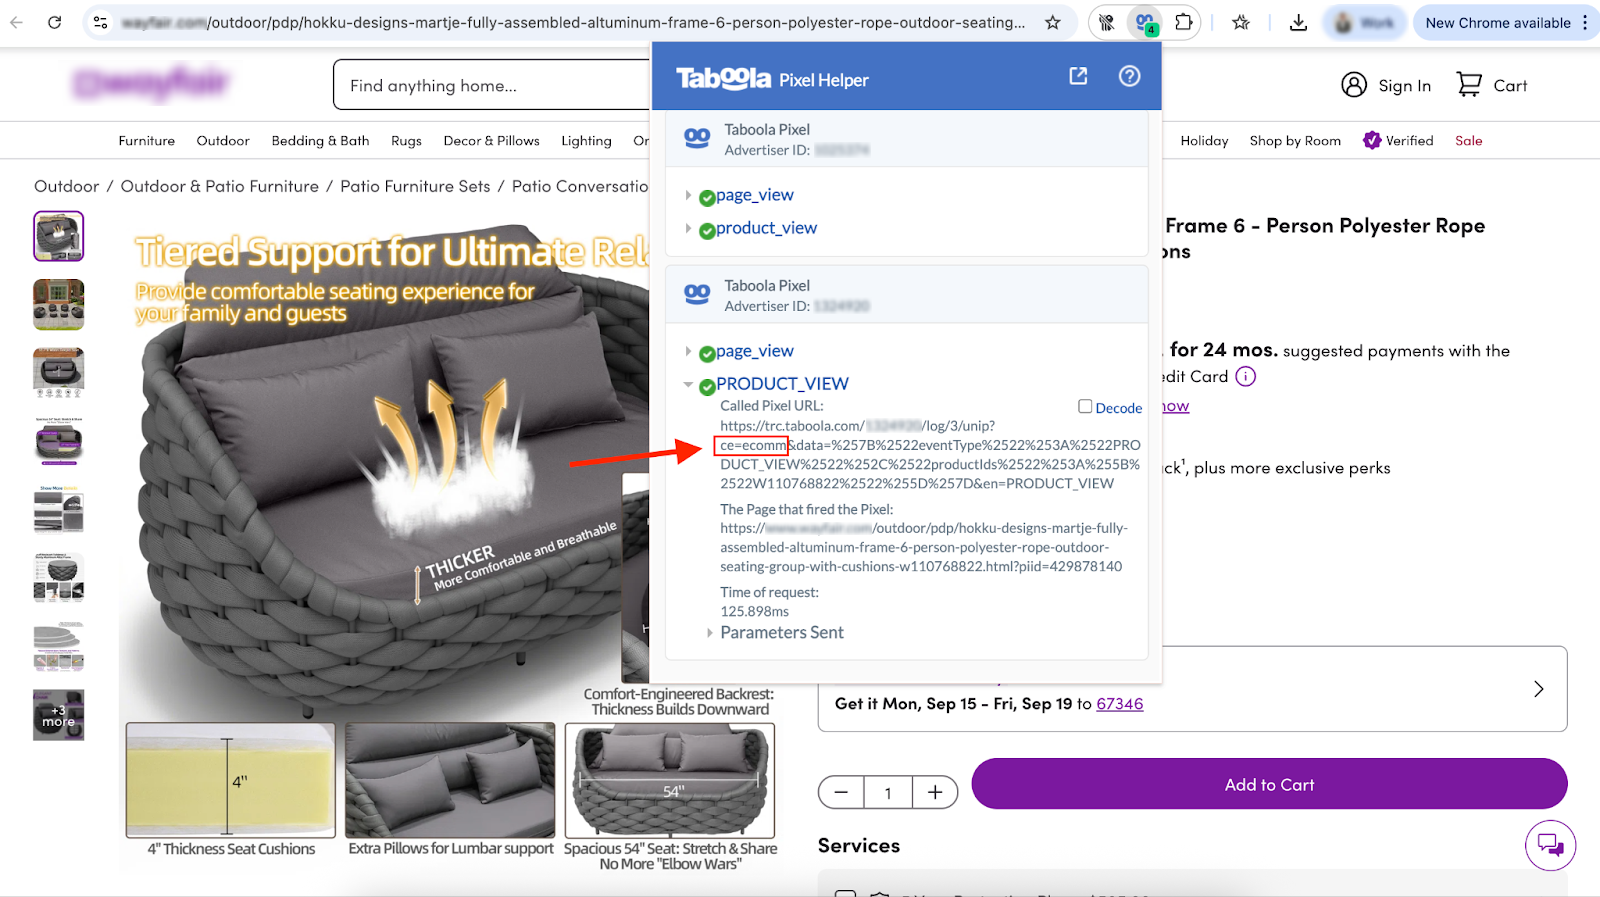
Realize dashboard validation
This validation method allows you to verify that Taboola is receiving your events. Note that it may take a few hours after publishing for events to appear in the dashboard. Available for Google Tag Manager, Javascript and Server-to-Server integrations.
Dashboard access requiredThis method requires access to the Realize dashboard. Contact your Taboola account manager if you need access.
Verify events are being received
-
Open the Realize dashboard.
-
Select your account (top right).
-
In the sidebar (left), select Tracking.
-
Verify that at least the mandatory events (
PRODUCT_VIEW,ADD_TO_CART,PURCHASE) show as Active: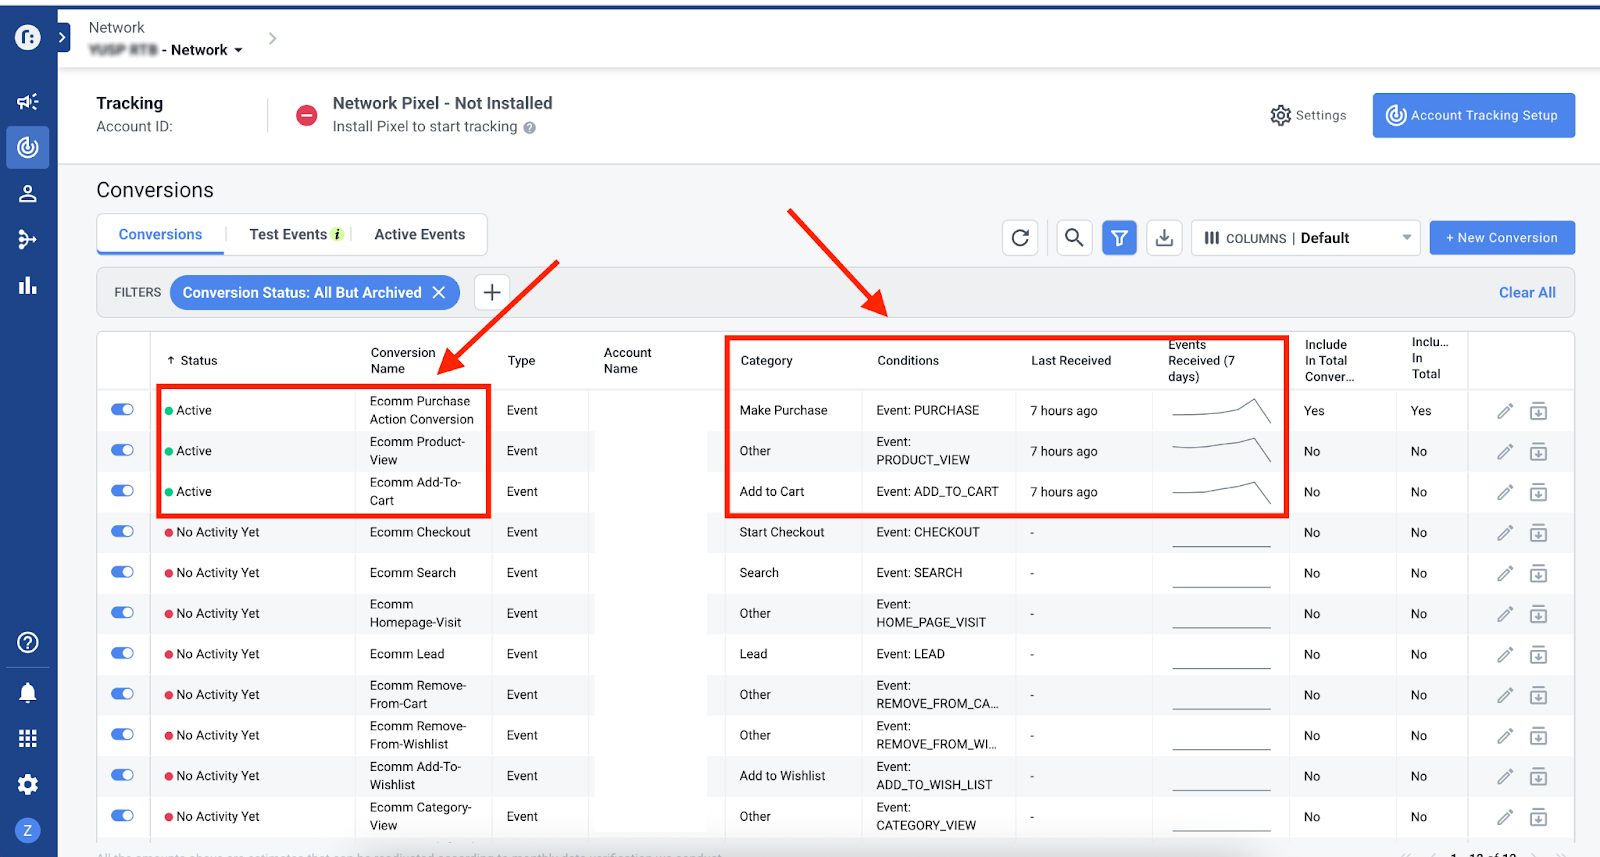
-
Note the Last received status to confirm recent event activity.
Allow up to 1 hour for conversion events to appear in Realize after firing on your website.
GTM debugging
This validation method is only relevant for GTM implementations:
- In your GTM workspace, click
Previewfrom the top right. - Open your website in a new tab.
- Verify that your Taboola pixel has fired correctly.
Common issues
Wrong Advertiser ID
Ensure that you're using the Advertiser ID supplied by your DCO Account Manager. This is NOT the same as your DCO Seat ID.
Using wrong GTM template
When implementing the pixel, ensure you're using the Taboola E-Commerce Events Tracking Pixel template (not the Taboola Pixel template).
Using 'event' instead of 'ecevent'
When implementing the pixel using JavaScript, only the page_view event should have notify: 'event'. All other events must have notify: 'ecevent'.
Example:
// page_view event (correct)
window._tfa.push({
  notify: 'event',
  name: 'page_view',
  id: ACCOUNT_ID,
  unified_id: hashed_email
});

// PRODUCT_VIEW event (correct)
window._tfa.push({
  id: ACCOUNT_ID,
  notify: 'ecevent',
  name: 'PRODUCT_VIEW',
  unified_id: hashed_email,
  productIds: ['sku1']
});
Changes not published
After creating and verifying tags in GTM, you must submit and publish the changes to apply them to your live environment:
- Click
Submit. - Click
Publish. - Verify that your changes are live.
Product ID mismatch
Ensure that you're sending the correct Product ID, otherwise the system won't be able to recommend the proper items to users.
ImportantThe Product ID value must match one of the product identifier columns (e.g., GTIN, SKU, MPN, etc.) in your feed. Product ID values passed for Product View event should be consistently passed across all other events (e.g., Purchase event, Add to Cart event, Category View event, etc.).
Example:
- ✅ Correct: Product feed ID:
PROD123, Pixel event:['PROD123'] - ❌ Incorrect: Product feed ID:
PROD123, Pixel event:['prod123']or['PROD-123']
Updated 10 days ago